Being a bridesmaid is an honor that comes with the desire to look your absolute best while complementing the bride on her special day. For bridesmaids blessed with long locks, the styling possibilities are endless—but finding that perfect balance between elegance and practicality can be challenging. You want a hairstyle that not only photographs beautifully but also stays put through hours of celebrations.
This article showcases 13 chic, achievable hairstyles specifically designed for bridesmaids with long hair. Each style is completely doable, even if you’re not a professional hairstylist, and will ensure you look stunning while standing beside the bride.
Before You Style: Key Considerations
Before diving into specific hairstyles, keep these important factors in mind:
- Coordinate with the bride: Ensure your hairstyle complements rather than competes with the bride’s chosen look.
- Consider the wedding venue: Outdoor beach weddings may require more secure styles than indoor ceremonies.
- Match the formality: The wedding’s level of formality should influence your hairstyle choice.
- Know your hair type: Choose a style that works well with your hair’s natural texture and thickness.
- Think about longevity: Select a style that will look great from first photos to last dance.
1. Romantic Loose Waves
Perfect for bohemian or garden weddings, loose waves create an effortlessly beautiful look that frames the face while keeping hair manageable.
To achieve this style, prep your hair with heat protectant and volumizing mousse. Use a 1-1.5 inch curling iron to create loose waves, alternating the direction of curls for a more natural effect. Once cooled, gently run your fingers through the waves and finish with medium-hold hairspray.
Pro tip: For longer-lasting waves, curl smaller sections and let each curl cool completely before touching.
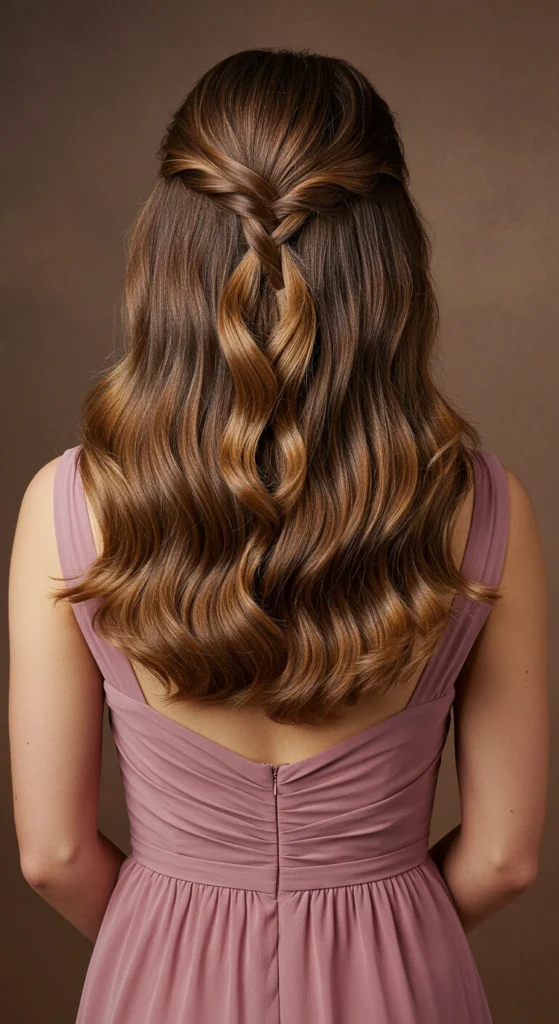
2. Elegant Half-Up, Half-Down
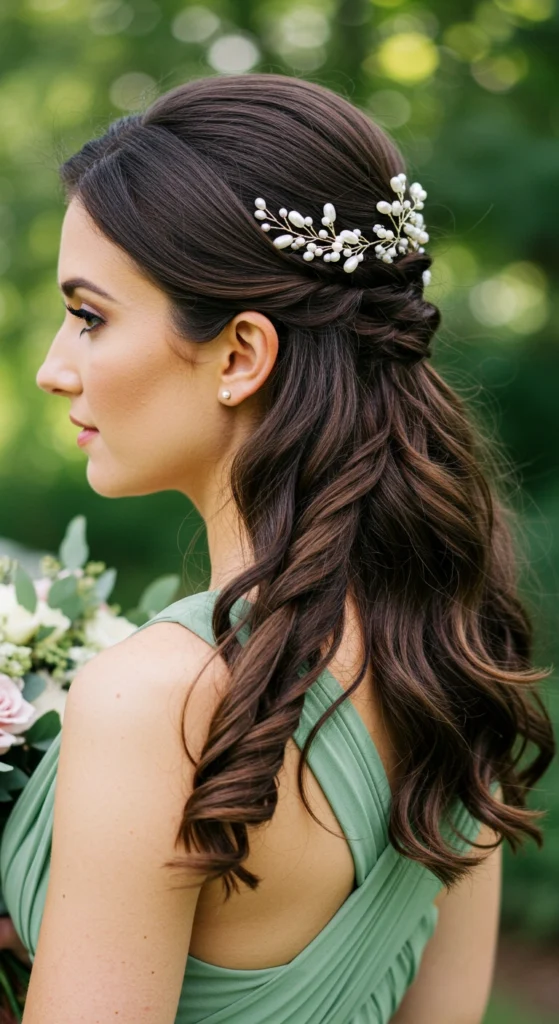
This versatile style offers the best of both worlds—the sophistication of an updo with the romantic flow of loose hair.
Start by curling or waving your hair for texture. Take two-inch sections from each side of your face and pull them back, securing with bobby pins that match your hair color. Add a decorative pin or small floral accent where the sections meet for an extra touch of elegance.
Pro tip: Tease the crown slightly before pinning back for added volume and visual interest.
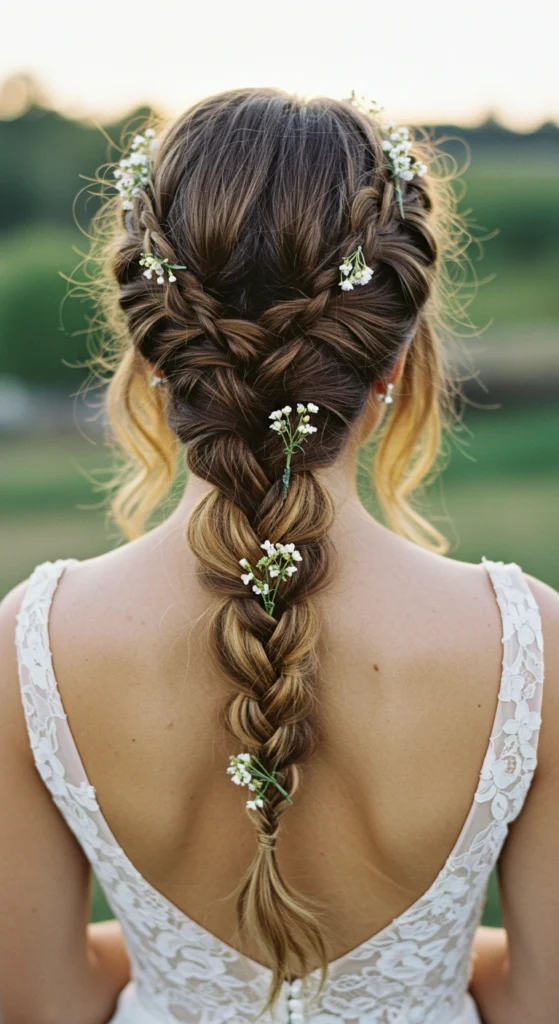
3. Bohemian Braided Crown
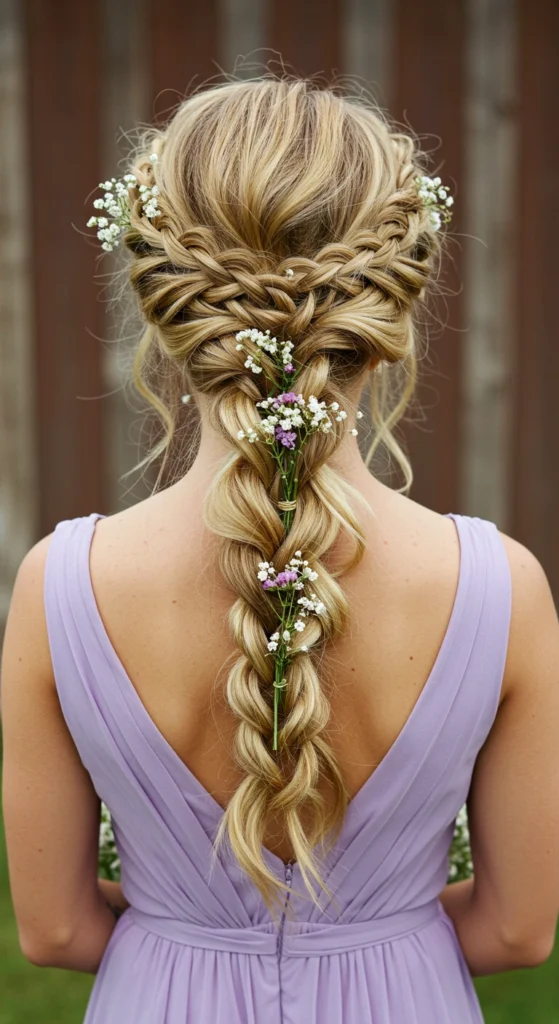
A braided crown creates a romantic, ethereal look perfect for outdoor and rustic weddings.
Create a deep side part, then Dutch braid (an inside-out braid where strands go under rather than over) along your hairline, continuing around your head. Secure with pins and gently pull on the edges of the braid to create fullness. Finish with hairspray and tuck small flowers or greenery into the braid for a seasonal touch.
Pro tip: If your hair isn’t quite long enough, use small clip-in extensions to achieve a fuller braid.
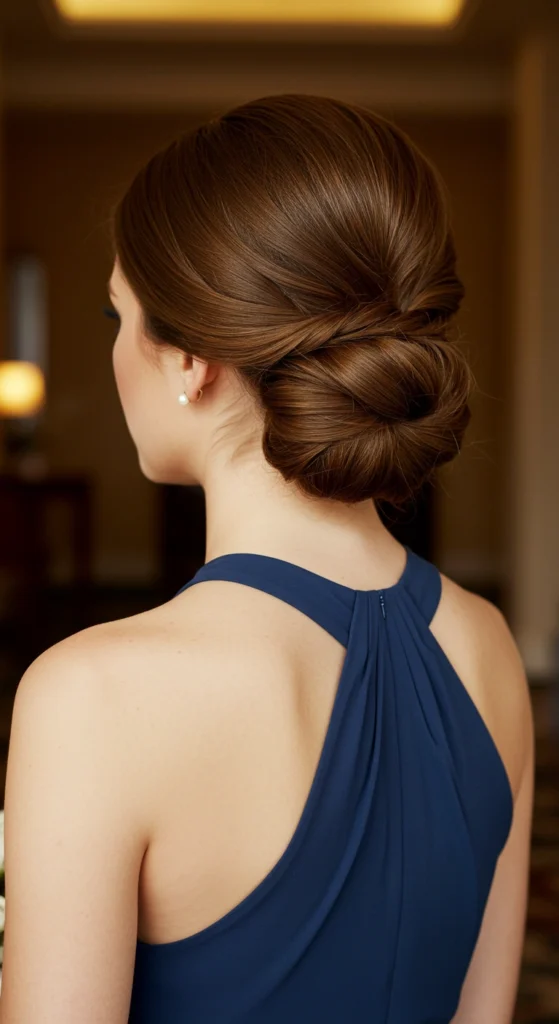
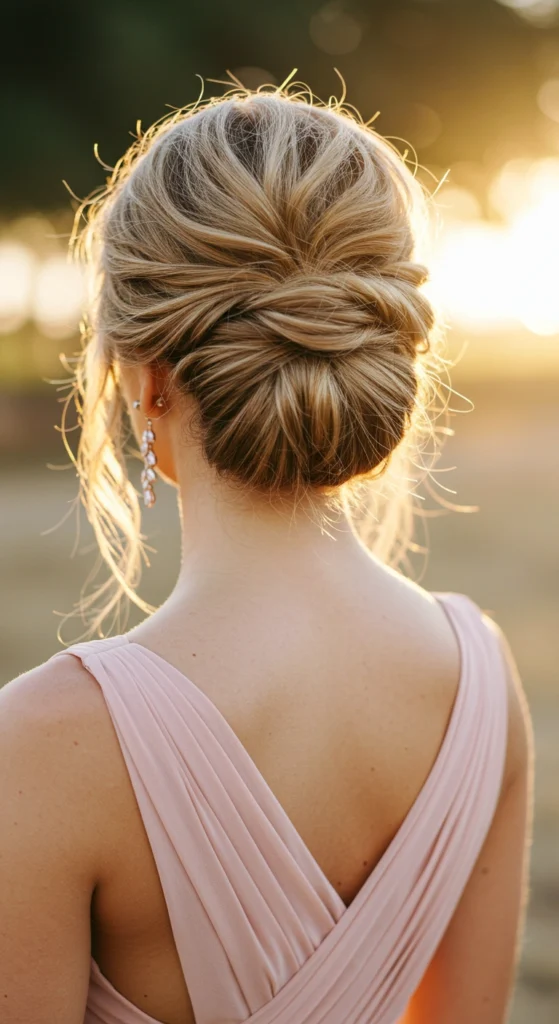
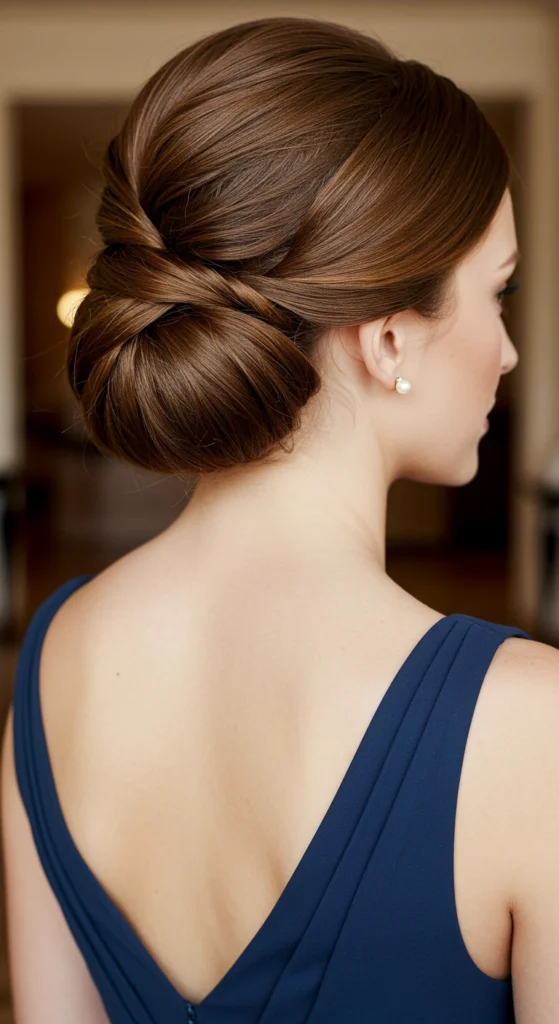
4. Classic Low Chignon
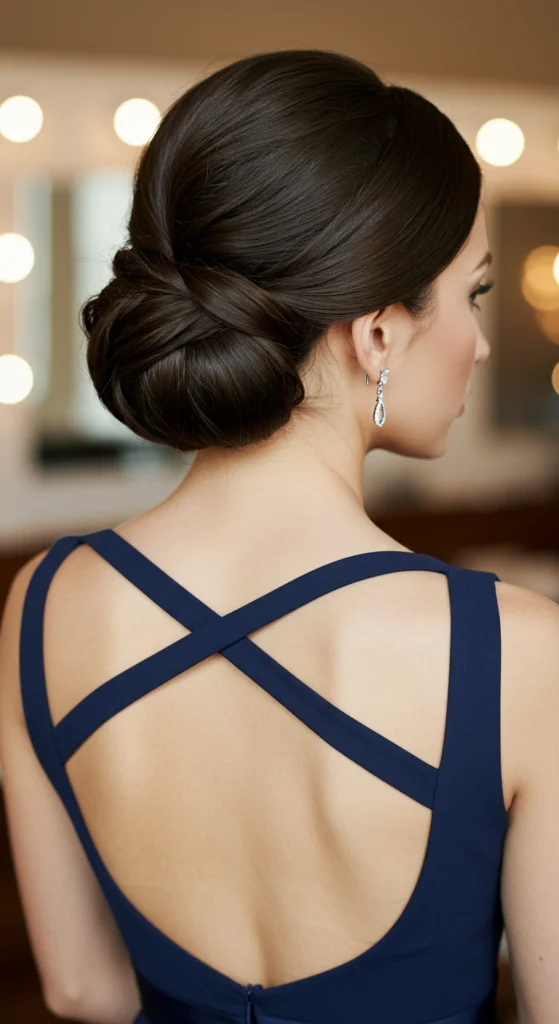
Timeless and elegant, the low chignon works beautifully for formal weddings and complements open-back dresses.
Create a low ponytail at the nape of your neck. Divide the ponytail into two sections and twist them around each other, then wrap around the base of the ponytail. Secure with pins, tucking in any loose ends. Finish with strong-hold hairspray.
Pro tip: For a more textured chignon, curl your hair before creating the ponytail.
5. Dramatic Side Braid
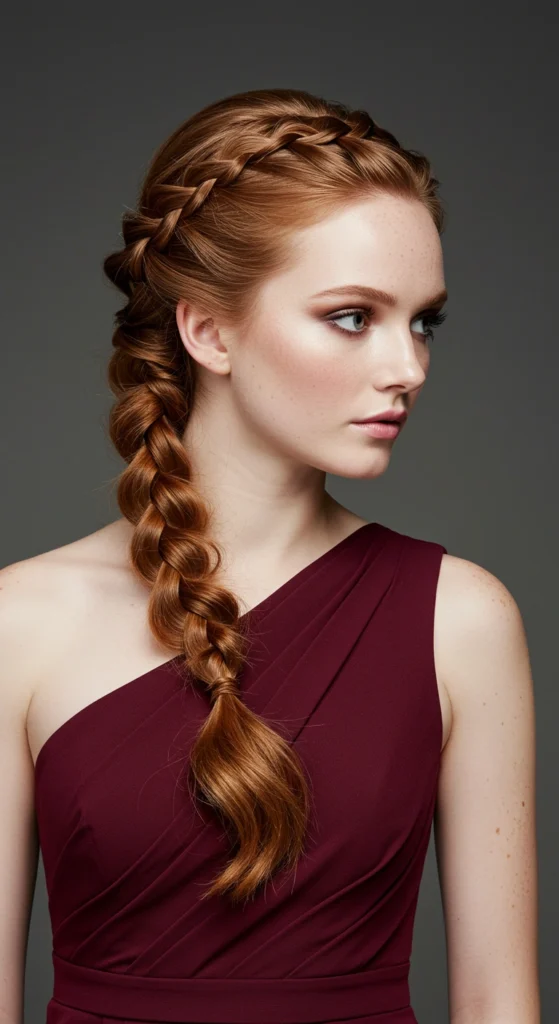
A side braid offers sophistication with a modern twist and works particularly well with one-shoulder dresses.
Part your hair deeply to one side. From the fuller side, create a French braid that continues down past your shoulder. Secure with a clear elastic and pull gently on the braid’s edges to create fullness. Mist with hairspray to hold.
Pro tip: Add small hair accessories like pearl pins or tiny flowers along the braid for extra dimension.
6. Twisted Rope Updo
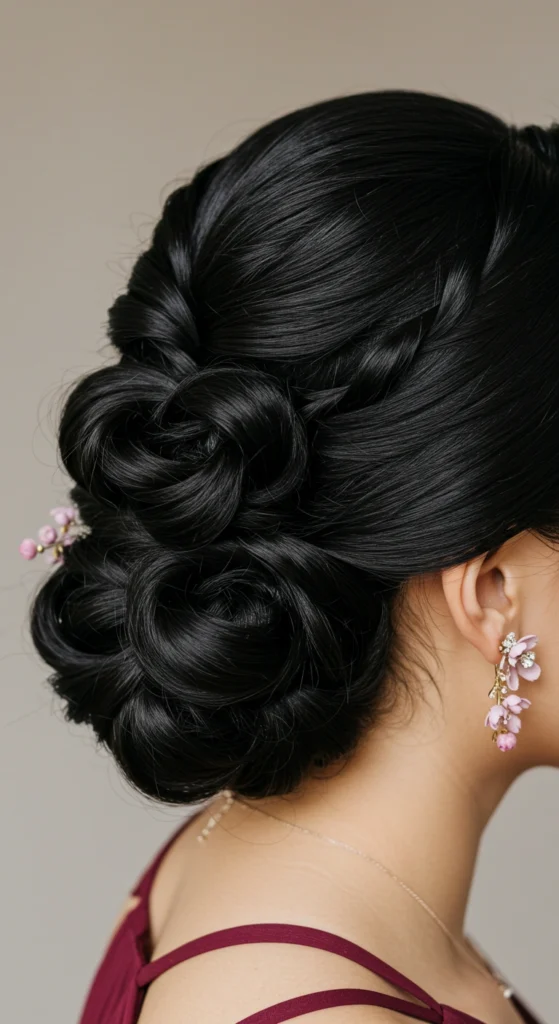
This elegant updo creates visual interest while keeping hair completely off the shoulders—ideal for summer weddings.
Divide your hair into two equal sections. Twist each section away from your face until they’re tight ropes. Wrap these twisted sections around each other, creating a rope braid. Coil this around itself at the nape of your neck, pinning securely as you go. Set with strong-hold hairspray.
Pro tip: For extra security, use a small clear hair donut as a base for your twisted bun.
7. Enchanting Waterfall Braid
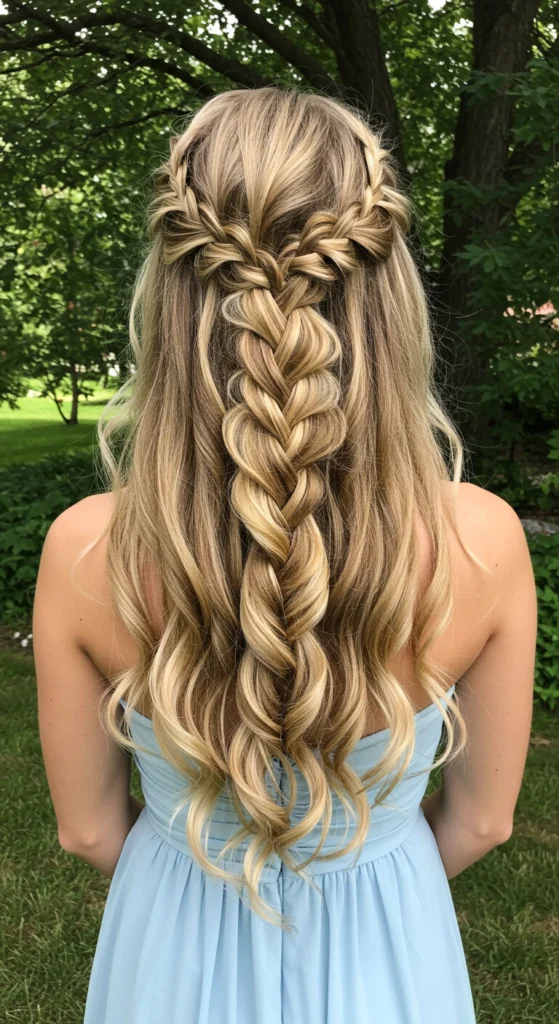
The waterfall braid creates a magical, flowing effect while keeping hair off your face.
Start a French braid near your temple, but instead of incorporating all three sections, drop one strand for every new strand you pick up (creating the “waterfall” effect). Continue around the back of your head. Secure the end with pins hidden under your loose hair. Curl the loose, cascading strands for added romance.
Pro tip: This style works best on hair with some wave or curl to disguise the connection points of the waterfall strands.
8. Voluminous High Ponytail
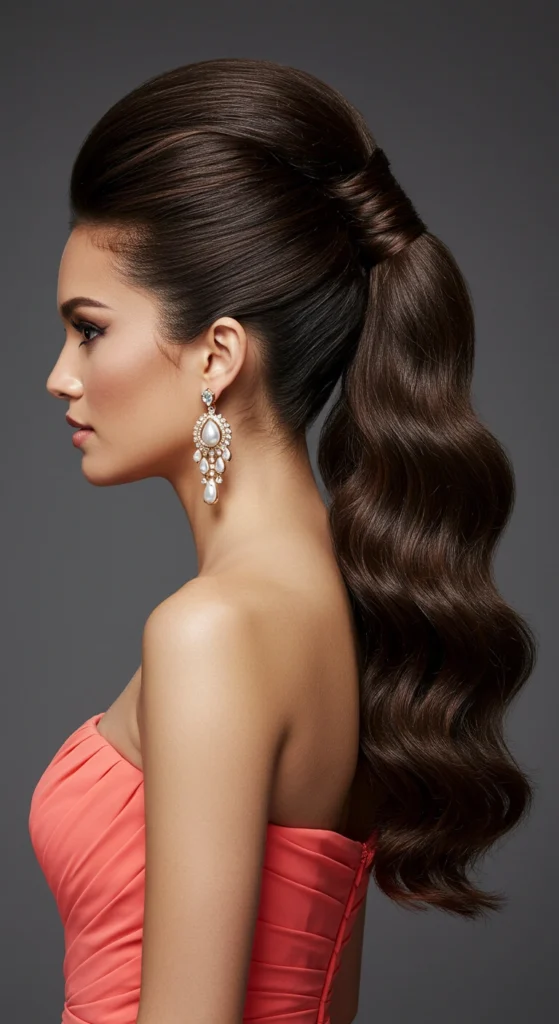
For a sleek yet dramatic look, a high ponytail with volume at the crown adds height and elegance.
Tease the hair at your crown for height. Gather hair into a high ponytail, securing with an elastic that matches your hair color. Take a small section of hair from the ponytail and wrap it around the elastic to conceal it, pinning underneath. Curl the ponytail for added bounce and movement.
Pro tip: For extra volume, use a volumizing powder at the roots before teasing.
9. Intricate Braided Updo
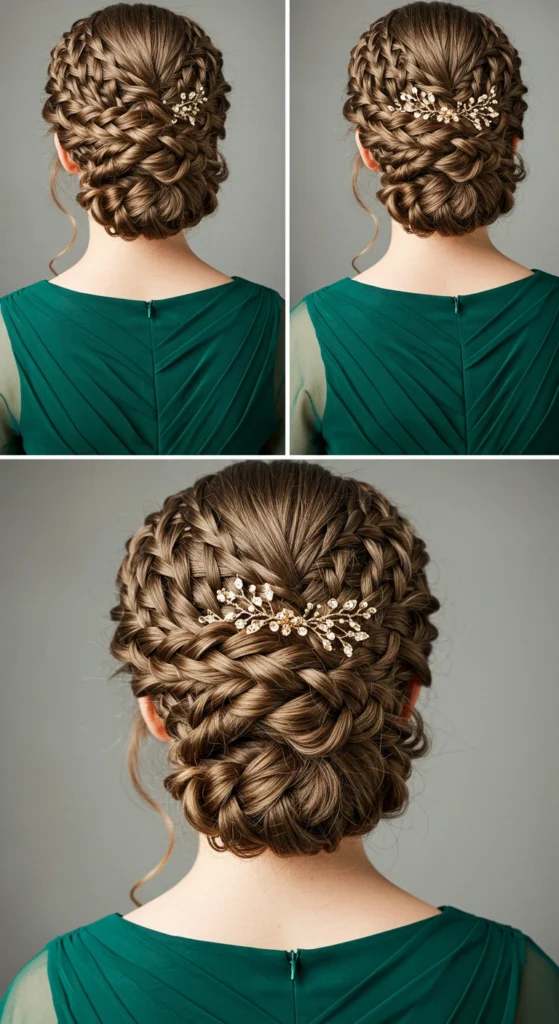
This show-stopping style combines multiple braiding techniques for a textured, dimensional look.
Create three to four braids of different types (French, Dutch, fishtail) across your head. Coil and pin these braids into an asymmetrical updo, focusing on creating an intentionally imperfect look. Pull gently on the braids to create fullness before pinning.
Pro tip: This style looks more intricate than it actually is—if a braid isn’t perfect, simply adjust how you pin it to hide any flaws.
10. Sleek and Straight
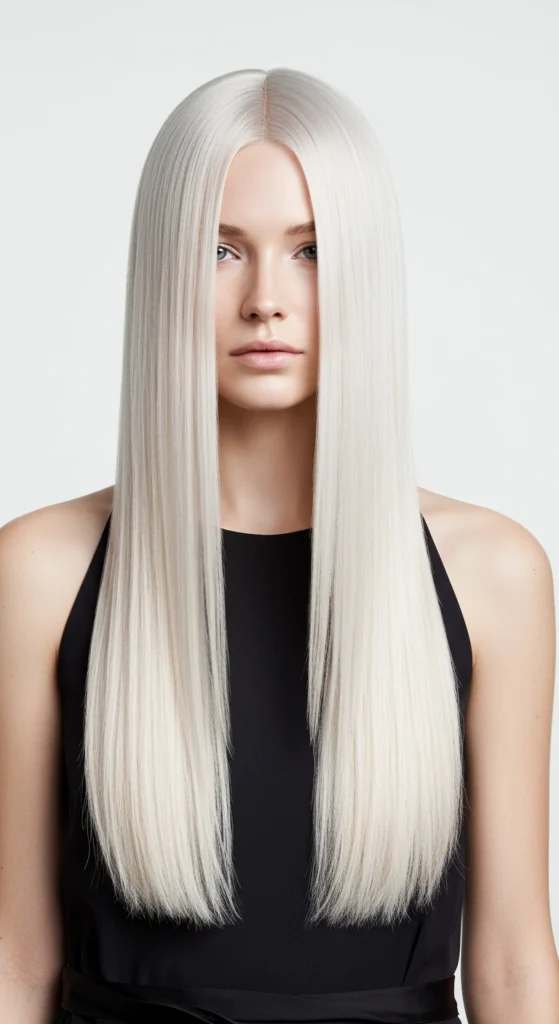
Sometimes simplicity makes the strongest statement. Sleek, straight hair creates a modern, sophisticated look.
Apply smoothing serum to damp hair and blow dry using a paddle brush for maximum smoothness. Once dry, use a flat iron in small sections for glass-like shine. Finish with a shine spray but avoid heavy products that might weigh hair down.
Pro tip: For extra sleekness, run a fabric dryer sheet over your finished style to tame flyaways.
11. Effortless Messy Bun
The “undone” look of a messy bun offers contemporary charm while keeping hair securely up.
Pull hair into a loose ponytail at your desired height. Twist and wrap the ponytail around its base, pinning as you go, intentionally leaving some pieces looser than others. Gently pull on sections to create that perfectly imperfect look. Set with flexible-hold hairspray.
Pro tip: For face-framing softness, pull out a few tendrils around your face and curl them lightly.
12. Glamorous Side-Swept Waves
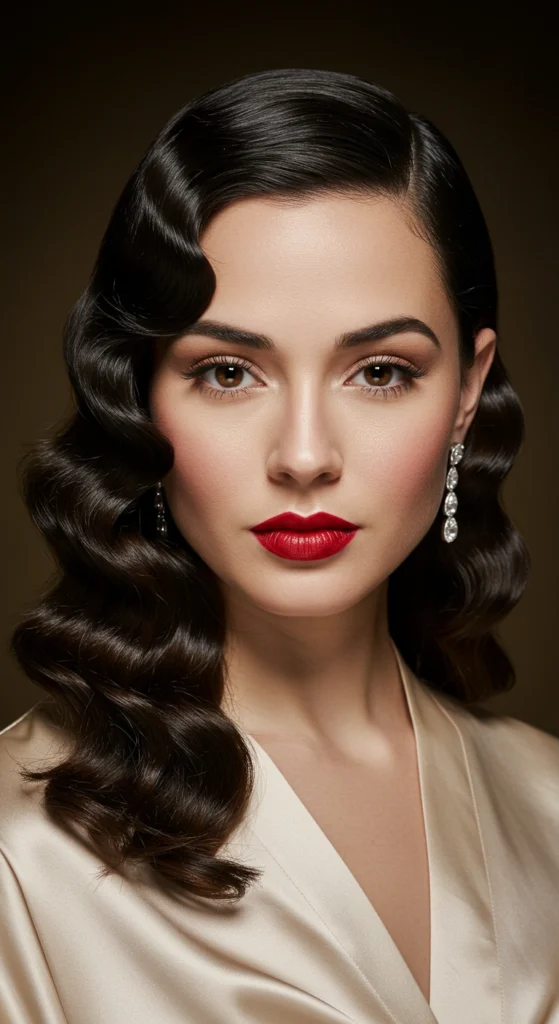
This Old Hollywood-inspired look brings serious glamour while keeping styling relatively simple.
Create a deep side part. Using a 1-inch curling iron, curl all hair in the same direction away from your face. Let curls cool completely, then gently brush through with a wide-tooth comb to create waves. Tuck the less-full side behind your ear and secure with decorative pins. Set with medium-hold hairspray.
Pro tip: For authentic vintage waves, use duckbill clips to set the waves while cooling.
13. Sophisticated French Twist
This classic updo never goes out of style and works beautifully for formal weddings.
Brush hair smoothly back into a low ponytail, but don’t secure with an elastic. Instead, twist the entire ponytail upward against the back of your head. As you twist, tuck the ends under and secure with long bobby pins inserted horizontally. Add decorative pins for personalization if desired.
Pro tip: For a modern update, leave the very top layers looser for a slightly undone effect.
Making Your Hairstyle Last All Day and Night
- Prep properly: Always start with day-old hair for better grip and use products designed for your hair type.
- Layer products strategically: Use mousse or styling cream before blow-drying, then hairspray after styling.
- Pin securely: Cross bobby pins in X-formations for maximum hold.
- Carry emergency supplies: Pack extra pins, a travel-size hairspray, and a small comb for quick touch-ups.
- Avoid touching: Resist the urge to touch or adjust your hair constantly throughout the day.
Final Thoughts
The perfect bridesmaid hairstyle balances beauty with practicality, allowing you to feel confident and comfortable throughout the wedding festivities. Whichever style you choose from this collection, remember to practice at least once before the big day—preferably with your chosen accessories—to ensure everything works together beautifully.
As a bridesmaid, your role is to support the bride while looking your best. These hairstyles will help you achieve that perfect balance, keeping you photo-ready from the walk down the aisle to the final farewell.